Watertight Miniature UHF Belt-Pack Transmitter
Rio Rancho, NM
11
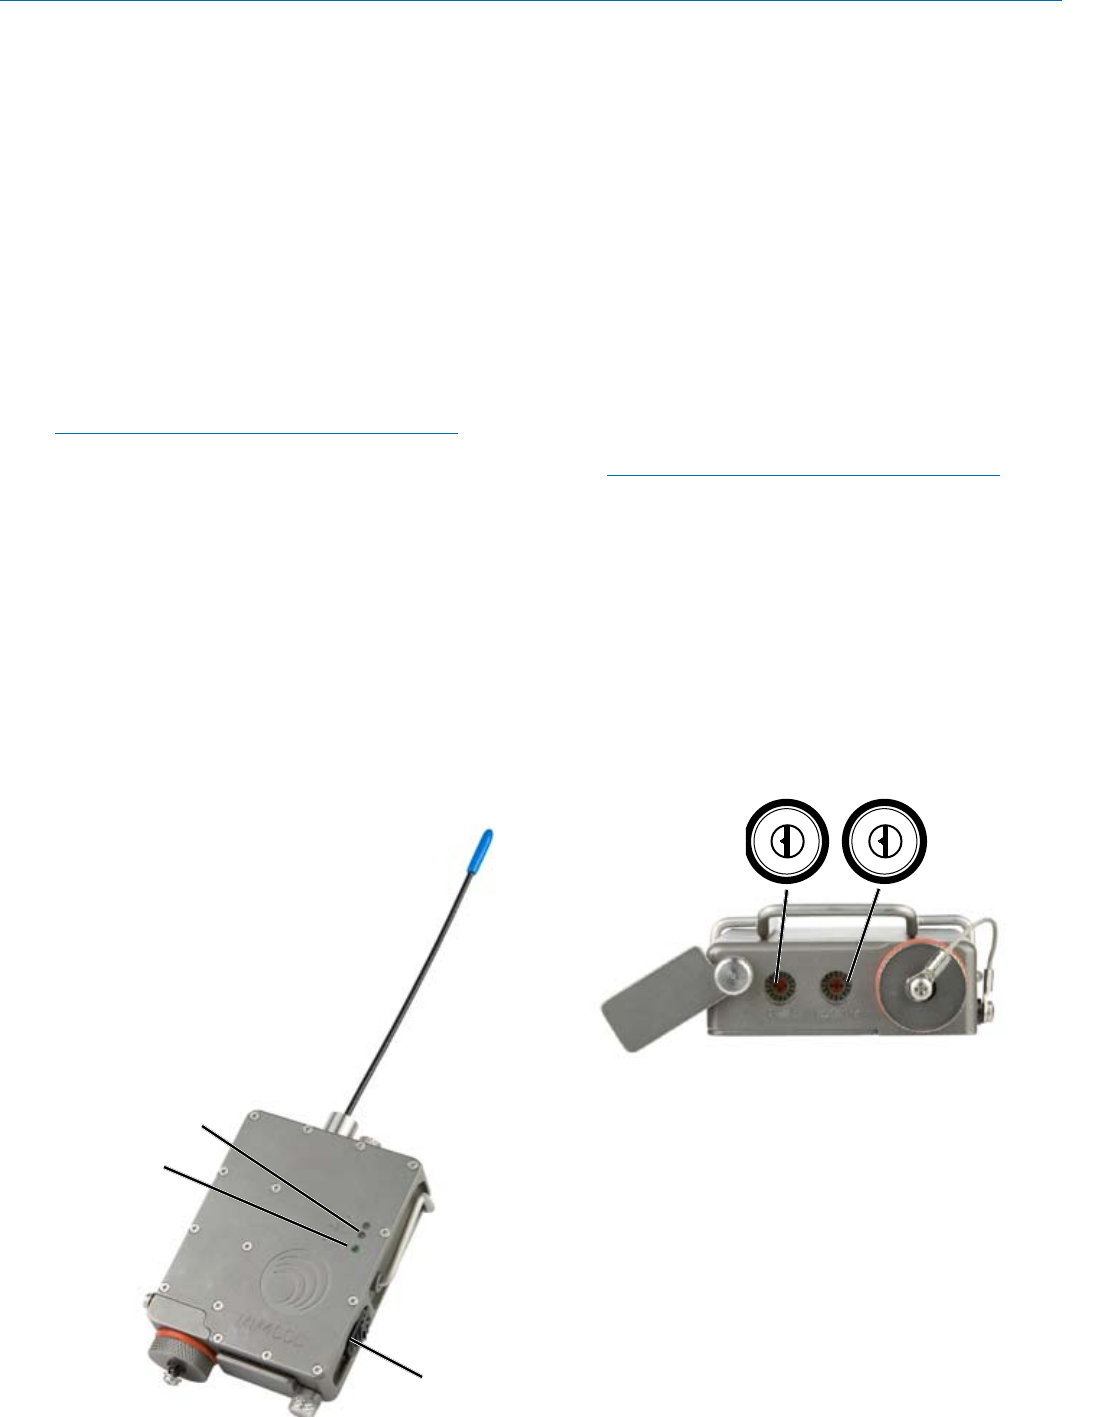
Modulation LEDs
POWER LED
Power ON/OFF
Switch
thetransmitterOff.
6) Change the Frequency Select Switch settings to
one of the following positions:
• 100Seriesmode: 1,1
•200Seriesmode: 2,2
•Mode3: 3,3
•400Seriesmode: 4,4
•IFBSeriesmode: 5,5
7) Power up the unit briefly – just long enough to
watch the LED’s glow and then turn the transmitter
Off.
8) Set the Frequency Select Switches to 0,0.
9) Turn on the transmitter and observe the Modulation
LEDs to verify the compatibility mode for the unit
has changed.
NOTE:Eachtimethetransmitteristurnedon,the
Modulation LEDs will confirm the current operating
mode with the number of blinks listed in Step 2.
The mode setting will not change until reset with
the procedure listed above.
Adjusting Transmitter Frequency
Ifyouareexperiencinginterferencefromanothersignal
on your operating frequency, you may need to change
the operating frequency of your system. This is done
through two Frequency Select Switches located under
the Frequency Switch Cover Plate on the bottom of the
transmitter case.
0
1
2
3
4
5
6
7
8
9
A
B
C
D
E
F
0
1
2
3
4
5
6
7
8
9
A
B
C
D
E
F
Frequency Select Switches
1.6M 100K
The left switch is for coarse frequency adjustment, and
itincrementstheoperatingfrequencyin1.6MHzsteps.
The right switch is for fine frequency adjustment and it
incrementstheoperatingfrequencyin100kHzsteps.
If you are using a 200 Series or 400 Series receiver,
it is suggested to use the built in frequency spectrum
scanning function on the associated receiver to find a
clear channel. Turn the transmitter off and leave the
receiver turned on. Scan across the frequency band to
find a frequency where little or no RF activity is dis-
played. Set both the transmitter and the receiver to this
new frequency. Turn on the transmitter to ensure the
RF signal is strongly indicated at the receiver.
Selecting the Compatibility Mode
All Digital Hybrid receivers are capable of working with
Lectrosonics MM400C transmitter, and by setting the
proper Compatibility Mode, the unit will also work with
200 Series and 100 Series analog receivers, plus some
otherbrands(contactthefactoryfordetails).Inorder
to operate properly, the transmitter must be set to the
operating mode of the matching receiver, which is easily
done using a small screwdriver and a battery.
The following procedure assumes that the Power
ON/OFFswitchisconguredforNormalMode.Ifit
has been configured for Audio Mute Mode, see Power
Switch Function Selection to change the configuration
to Normal Mode.
Note: The unit comes from the factory in the Digital
Hybrid mode.
1) Set the audio controls for the corresponding re-
ceiver to minimum.
2) Install a good battery in the transmitter. Move the
PowerSwitchtoONandobservetheModulation
LEDs to determine the current Compatibility Mode.
The –20 and –10 LEDs will blink simultaneously:
•Oncefor100Seriesmode
•Twotimesfor200Seriesmode
•Threetimesfor“Other”receivers
• Fourtimesfor400Seriesmode
•FivetimesforIFBSeriesmode
3) MovethePowerSwitchtotheOFFposition.
4) Loosen the Frequency Switch Cover Plate
Retaining Screen and rotate the cover to
exposetheFrequencySelectSwitches.
Withasmallscrewdriver(included
withyourunit),settheFrequency
Select Switches to CC. (for
Change, Change).
5) Power up the unit briefly – just
long enough to watch the
LED’s glow and then turn
Operating Instructions
 (20 pages)
 Manymanuals.com
 Manymanuals.de
 Manymanuals.fr
 Manymanuals.it
 Manymanuals.pl
 Manymanuals.cz
 Manymanuals.es
 Manymanuals-pt.com
Comments to this Manuals